Blink Shell: First Thoughts
Updated Sunday, Sep 1, 2024
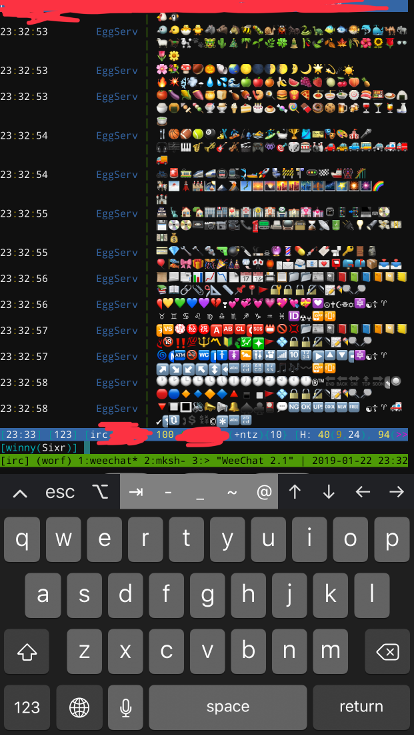
As a heavy user of SSH to manage computers and IRC via command line clients, the most used application on my phone besides the web browser is a SSH client. Previously I have used Prompt and it worked, but barely. My issues with Prompt include crashing on emoji spam that is common in certain IRC channels, very slow terminal rendering to the point that watching the output of compiling a large package will cause Prompt to lag uncontrollably for tens of seconds, and a relatively un-intuitive UI. Please note I am referring to Prompt, not Prompt 21, which is another problem in itself (the idea I need to pay for the same product but rewritten to actually work is just ludicrous).
Another thing to note before I dig into Blink is I’m not a big fan of mobile devices. They get the job done, but in most cases I rather crack open my netbook and not fight with the learn-by-fiddling mobile UI paradigms most devices have adopted. I am also not a fan of Apple’s ecosystem, but I’m pretty content with my iPhone and iPad for my basic use cases: browse the web, chat applications, making phone calls, casual mobile gaming, logging into other computers via SSH.
Enter Blink2. This application does a few things differently from other mobile SSH clients. It offers a command-line first user interface. At first I thought this would be painful, but the application’s verbs are pretty simple and appear to match up with how one uses ssh and mosh in a terminal emulator. The terminal emulator is responsive, significantly more stable than Prompt, and looks good. I can even load up my favorite font: Droid Sans Mono3 (thanks to its support for loading webfonts via a URL to a CSS file).
Another thing Blink does different is it offers Mosh support4. Mosh is an alternative to SSH that can “roam” across networks and device power state changes. One thing to note is Mosh requires SSH to make the initial login, then switches to Mosh which uses a different protocol. When using mosh, I tend to log in once throughout the day. I can then switch networks and mosh will gracefully reconnect as soon as the server is reachable again. In addition, when I sleep my netbook, the session isn’t lost (but don’t go using this instead of tmux or screen). Instead when I wake my netbook, it also gracefully reconnects to the server. The same is true of Blink’s Mosh support. It even appears to save state between changing iOS application states, sans forcing the application to quit (or rebooting your device). This means I only log in once on my phone throughout the day, and the connection is gracefully dropped when the app becomes inactive and reconnects when the app is opened again.
I did notice I crashed Blink after writing non-ascii binary data to the terminal followed by some other operations, but did not manage to reproduce the crash yet. If I do, I am confident I can report the bug and get meaningful feedback too, as Blink has a bug tracker on GitHub5. The code is available under GPLv3 (but not to worry, as the single copyright holder can safely relicense it to deploy on the iOS App Store6). I could probably build it myself and install that, but I neither own a Mac (or wish to install Mac OS X in a VM) nor want to ever open XCode again even if I had a way to. That life isn’t for me. Again, I’m very practical about how I use my iOS devices and don’t enjoy using them more than I have to, so I’m willing to pay $20 for an application I’ll use every day of my life on this walled garden platform. An added silver lining is this investment goes towards the development of such a great app that appears to have active maintainership.
Note: I did not explore some of Blink’s features such as using it a local iOS shell or settings synchronization. YMMV.
§Getting started
Here are the steps I used to get started with Blink, as it was
relatively unclear where to find documentation and which settings
are necessary to configure. Usage information can be
found via the help command, the README on GitHub7, and fiddling
with the UI.
- Run the
configcommand.-
Default User -> set to your preferred username on most of your servers
-
Add a new font via: Appearance -> Add a new font. Open the gallery and grab the raw CSS file (you can get a raw URL after switching to GitHub desktop), then paste it into the URL Address Field. I prefer Droid Sans Mono for its readability at all sizes.
-
Keys -> + -> Create New
Please use ssh keypair authentication. Password authentication requires you to memorize a password to log in which can be bruteforced or otherwise leaked when typing it in the wrong context. Also, be sure to use a unique key on each of your devices to make revocation easier when a device is no longer used.
Note: it appears keys are always stored as plaintext, which is acceptable for your uses, but it appears
ssh-keygencan create a key with a passphrase. I wasn’t able to get Blink to work with Passphrase protected keys, but I didn’t try very hard. YMMV.- Type: RSA
- Bits: 4096 (why not?)
- Name:
id_rsa
-
Hosts -> +
- Host: the name you gave your host when running
ssh hostormosh host. This is not related to the server’s hostname, though it can be the same. I prefer simple names, usually the hostname before the first dot (e.g.worf.winny.techbecomes simplyworf) - User: make sure this is correct
- Key: select a key to use.
- Host: the name you gave your host when running
-
- Now you need to install the SSH public key:
-
Run
configagain -
Keys ->
id_rsa-> Copy Public Key -
Install it some way.
I usually prefer to visit https://ptpb.pw/f and paste the public key, hit Paste, then copy the url with the text of “created”. You can then
curl https://ptpb.pw/PasteIdon the server via another login setup (or ssh from a set up machine) and add it to your~/.ssh/authorized_keys. Make sure that file is mode 0600 (chmod 0600 ~/.ssh/authorized_keys). Also make sure the.sshdirectory is 0700 (chmod 0700 ~/.ssh). OpenSSH refuses to useauthorized_keysif these permissions are world readable.
-
- Run
ssh worf. Congratuations, you now have a SSH session on the best iOS client available at this time. - To use mosh, ensure mosh is installed on the server.8 Then
run
mosh worf.